Home › Tutorials › Convert a PDF floor plan to a 3D home
How to Convert a PDF Floor Plan Into a 3D Home You Can Walk Through
A PDF is a picture of a home, not a home. This is the long version, filmed end to end: the same drawing an architect would send you, turned into a model you can stand inside.
Watch it (11 minutes)
It takes about ten minutes the first time and two or three once you know the moves. Here is every step in writing.
Step 1 — The drawing you start with
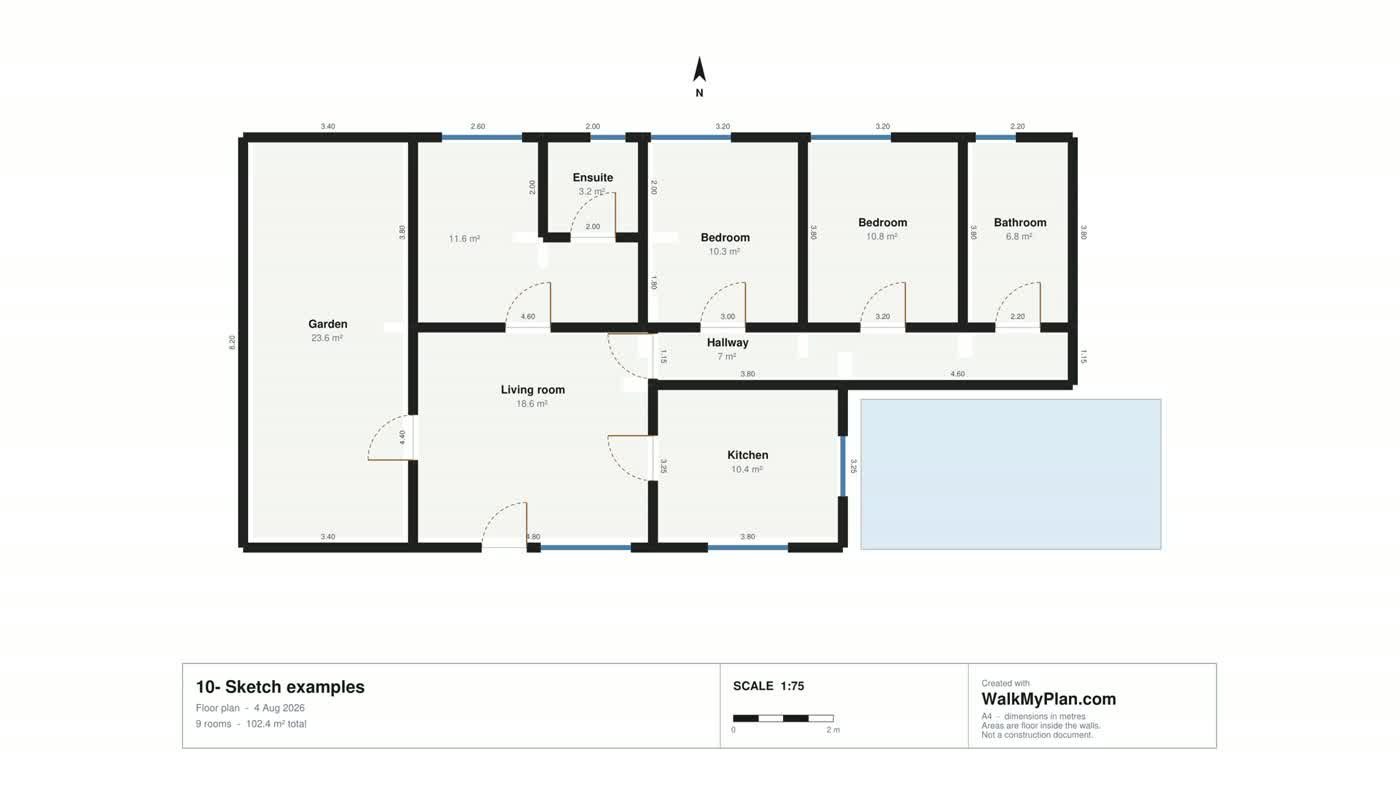
This is an ordinary architect's PDF — walls in black, room names, areas, a scale bar in the corner. Nothing about it is special, and that is the point. Drag it onto walkmyplan.com and the drawing becomes the paper you work on.
Step 2 — Your drawing, with tracing paper over it
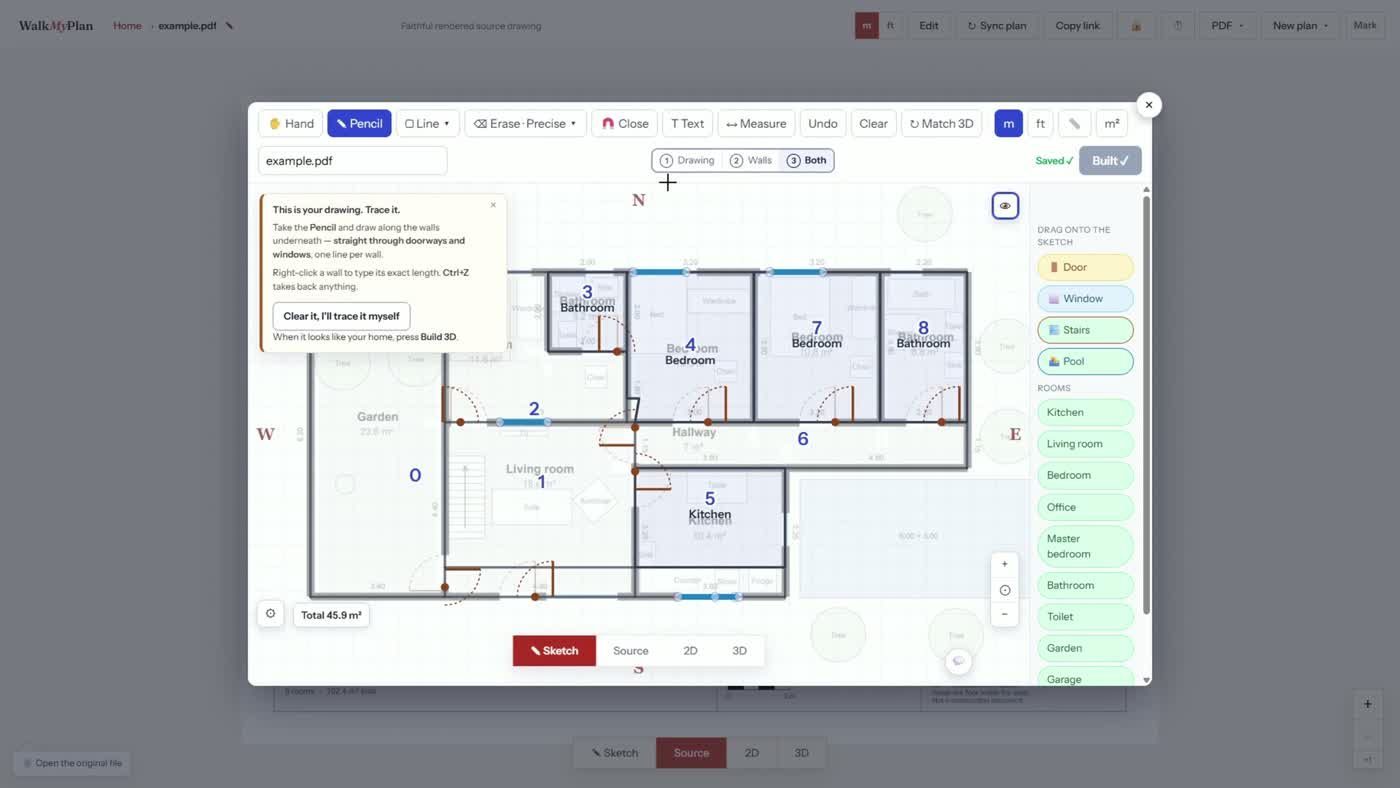
The drawing goes under the sketch pad and the pad stays empty — the walls are yours to draw. The card in the corner says it plainly: take the pencil and draw along the walls underneath, straight through doorways and windows, one line per wall. A DWG is different: real CAD geometry is read directly, so a DWG often arrives already built.
The three tabs that keep you oriented
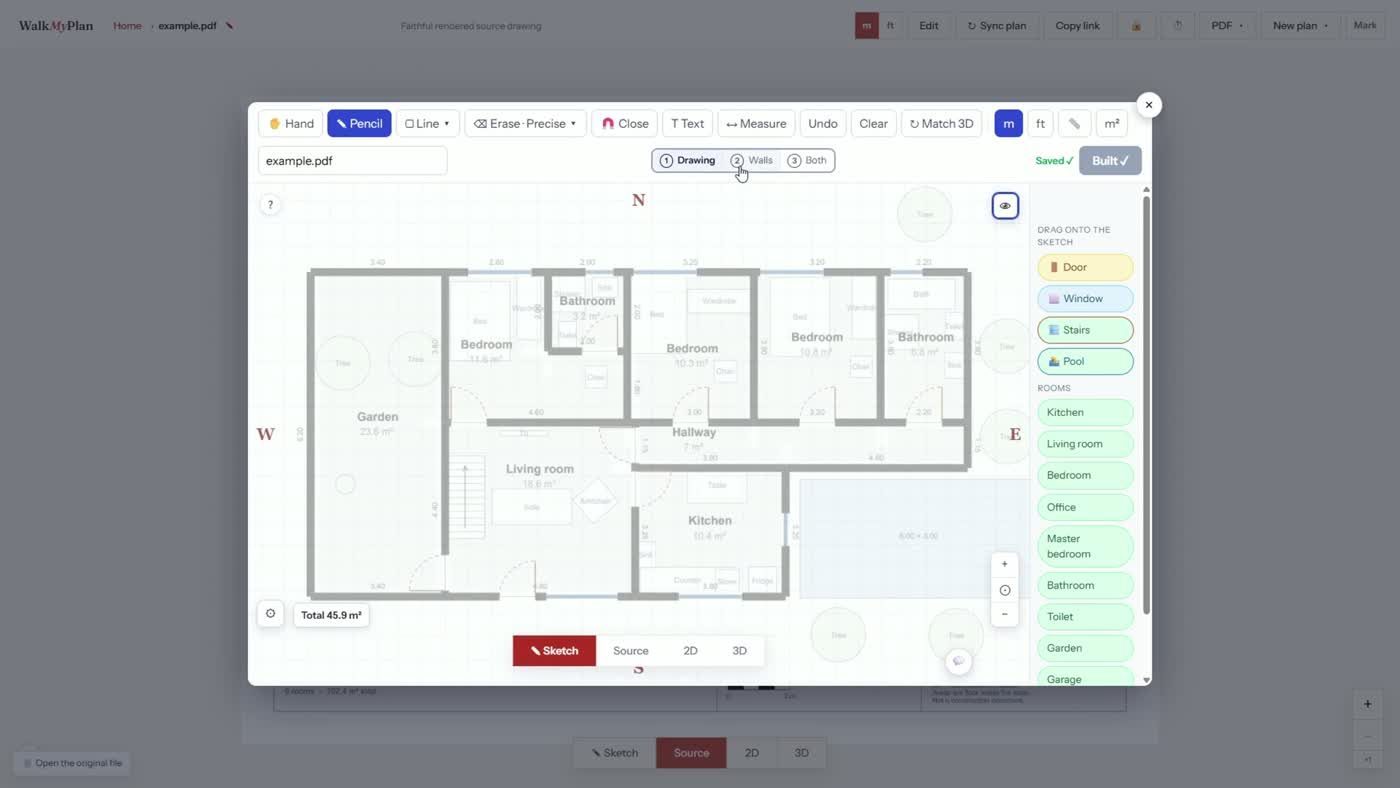
These three little tabs do more work than anything else on the screen. Trace in Both so you can see the lines you are following, then flip to Walls to check your work without the drawing confusing you.
Step 3 — Follow the lines
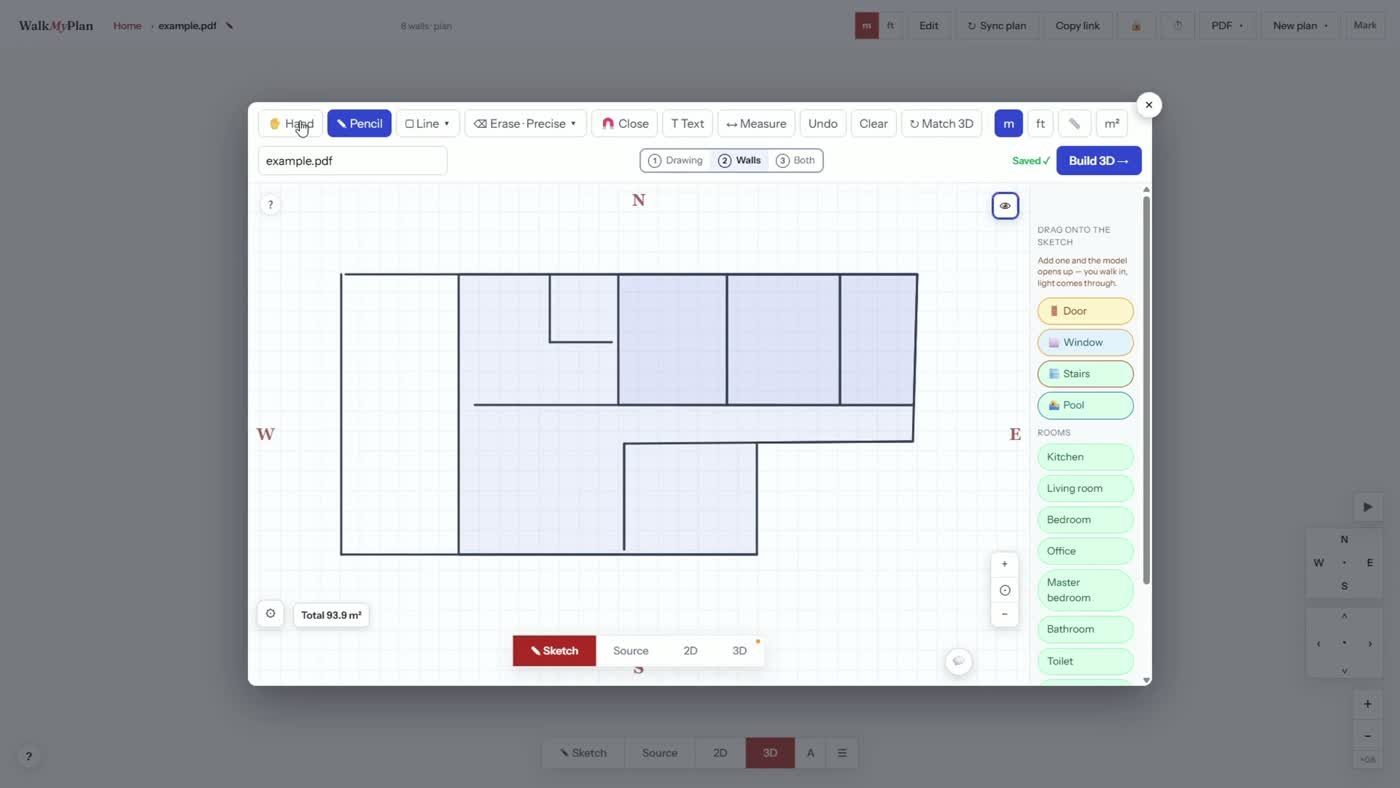
Draw along each wall. Lines snap straight, and the moment a shape closes it becomes a room with its own area. Where the drawing shows a gap for a door, run the wall straight through it — doors are their own thing and come later.
Step 4 — Tell it how big the house really is
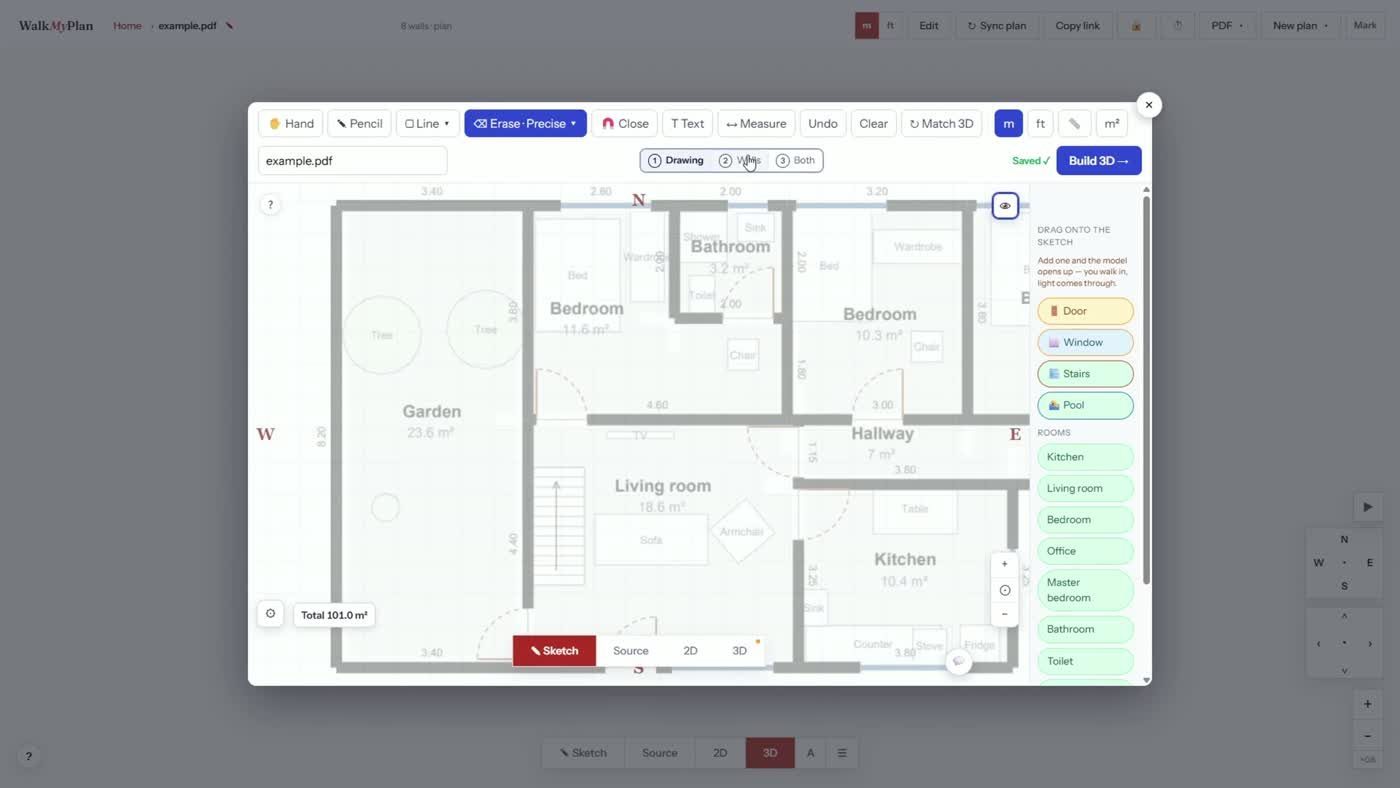
A tracing has no real size until you give it one. Find one wall you know the length of, right-click it, and type the real number — the whole plan rescales around it. Get this right and everything downstream is right: the doors fit, the furniture fits, and any realistic image you render later looks like a real room instead of a doll's house.
Step 5 — Doors, windows, and anything outside
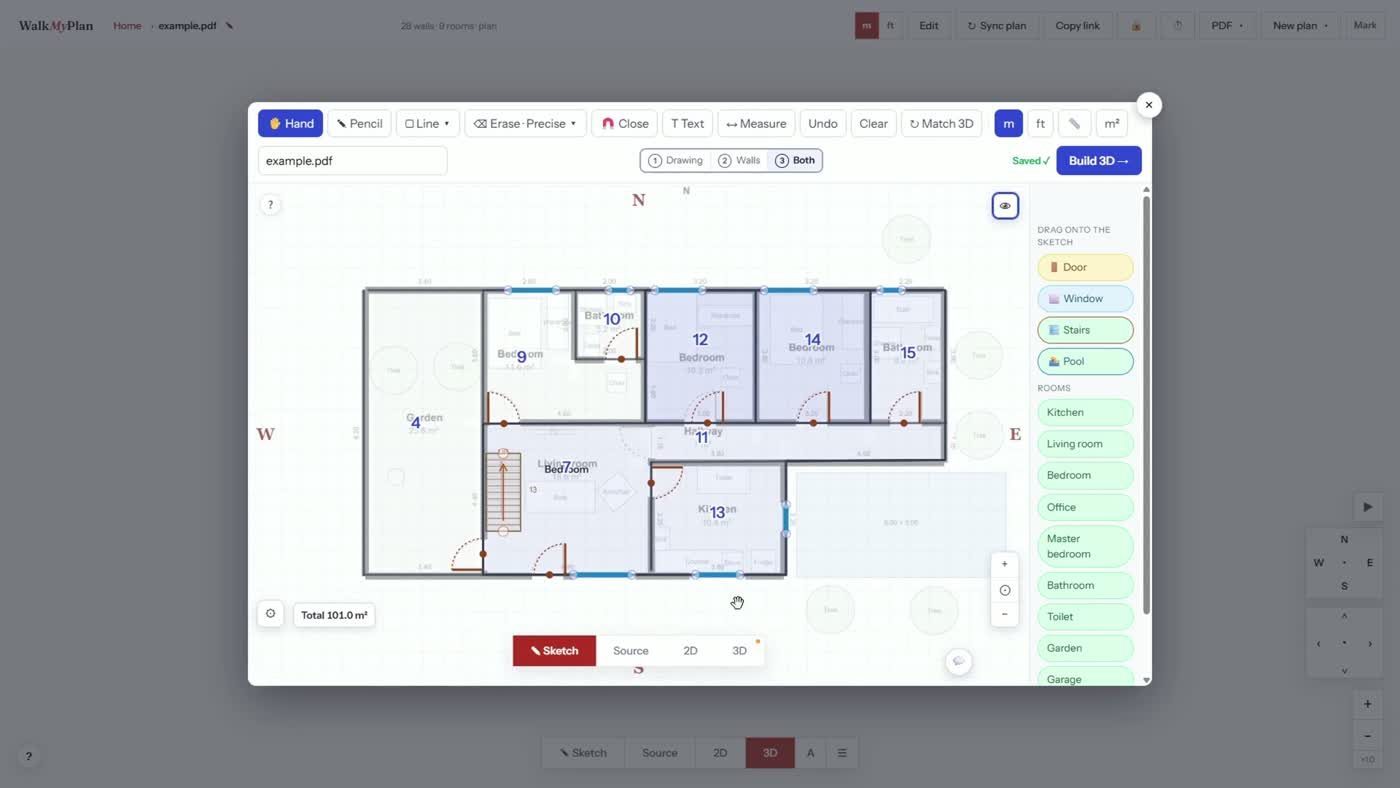
Doors and windows are chips on the right. Drag one onto a wall and stretch it to match the drawing, then pick the arc so the door opens the way the PDF says. A pool, a pergola or a garden can go outside the walls in the same way.
Step 6 — Press Build 3D
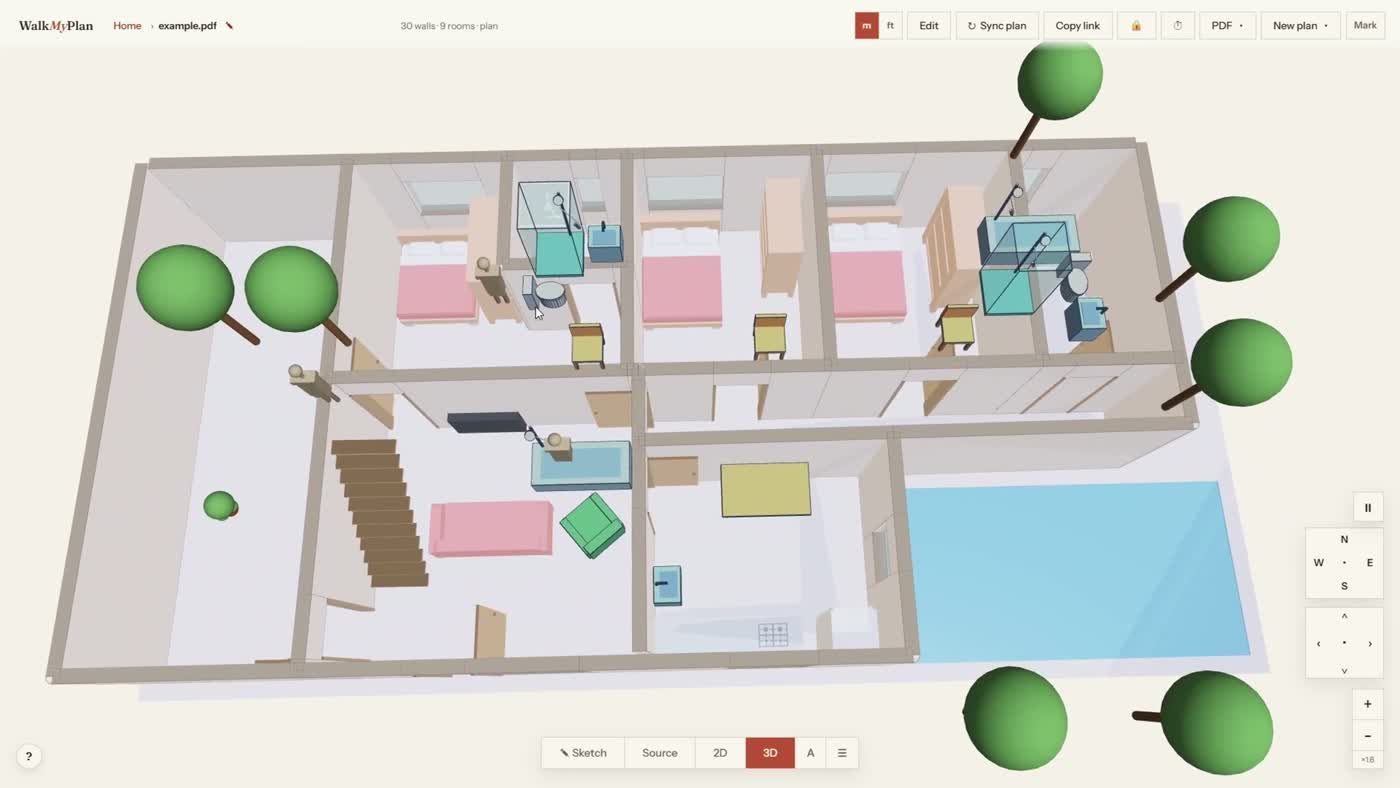
A few seconds after you press Build 3D the flat PDF is a home. Orbit it, tilt it, drop to eye height and walk from room to room.
Step 7 — Check it against the drawing
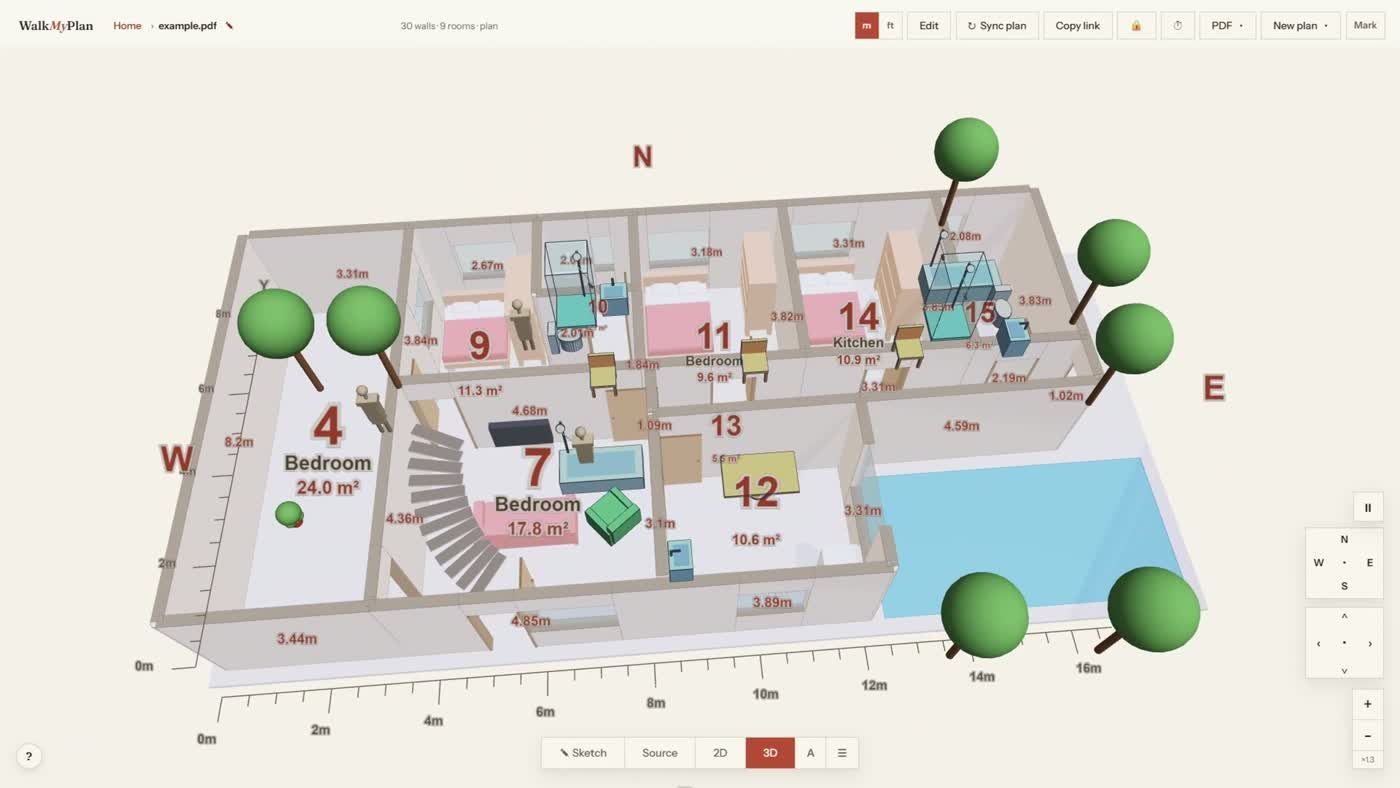
The model can label itself: room areas, wall lengths, and a ruler along the edge. Compare a couple of numbers against the PDF. If one is off, fix the wall in the sketch and build again — it takes seconds.
Questions people ask
Do I need CAD software?
No. Everything happens in a browser. There is nothing to install and no CAD experience needed — if you can follow a line with a pencil, you can do this.
Is converting a PDF to a 3D home free?
Yes. Uploading, tracing and building the 3D model are free. Photorealistic images use credits, and new accounts include a signup bonus.
Why do I have to trace it? Can it not read the PDF itself?
It does read it, and on a clean vector PDF it often gets most of the walls on its own. Tracing is the reliable path: it works on scans and photos too, and it puts you in control of what counts as a wall.
What if my PDF is a scan or a photo?
That works. The drawing is a backdrop to trace over, so it does not need to be machine-readable. Photos of paper drawings are fine.
Can I print the finished plan?
Yes — the PDF button exports a printable floor plan with measurements you can hand to a builder.
Try it with your own drawing
Drag your PDF onto the page and follow the lines. Uploading, tracing and building the 3D home are free.